Time tracking, tips and tricks
This user guide will show you how easy it is to register work hours, vacation and leave.
Content:
Create time registration
Request Vacation
Create leave registration manually
Start sick leave
Start when you meet/ end when you leave
Tips and Tricks
Create a time registration
- Click Menu -> Worksheet and click the icon “+time” to create a new time registration on the desired day.
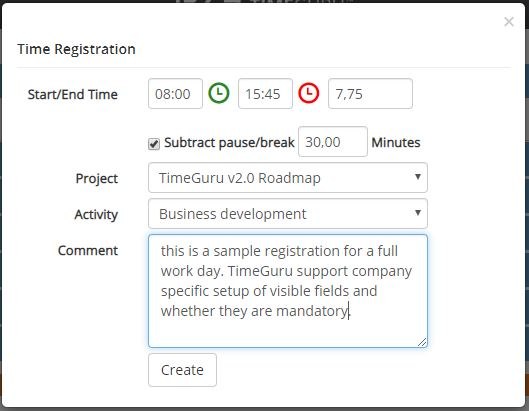
- Fill in start/end time or simply fill in hours as decimal.
- Select Customer, Project and/or Activity (some options can be turned off).
- Add a comment to you booking (typically not mandatory).
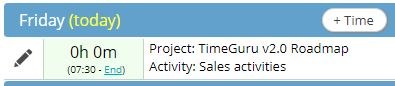
A time registration can look like this:
You can also read our complete guide of time registration.
Request Vacation
Go to “My dashboard” and find the box “Requests.” Click on the button “Request” and select vacation. Fill out the type (vacation, leave, osv. depending on setup) and the period. When your manager have approved, the request will turn green and vacation will automatically be registered in your worksheet. If your manager declines the request will turn red and you will receive an email with a reason for the decline.

Create new leave registration
- Go to Menu -> Worksheet and click the icon “+Time” to create a vacation registration.
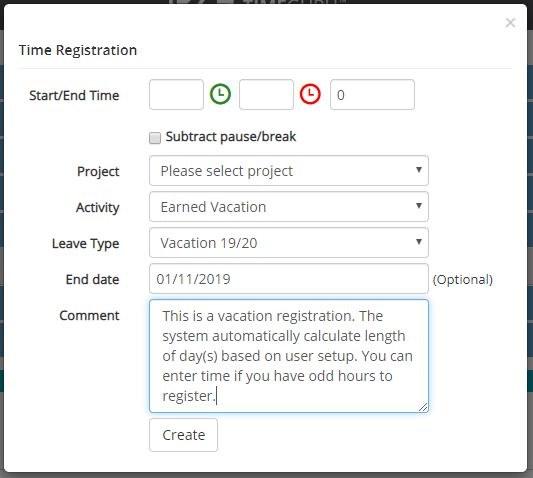
- Select the activity “Earned Vacation”. (no need to fill in time for whole vacation days)
- Select type of vacation and optionally set the end date to book more than one day.
- Write an optional command and click “Create”.
Earned and used vacation days will be immediately visible after registration in your personal dashboard. To open the dashboard, click the TimeGuru logo on the top or go to menu -> my Dashboard.
A leave registration can look like this:
Start sick leave
In the worksheet you can automatically start a sick leave registration by clicking “the little red handle” on the right. When you activate registration of leave, the system will automatically register your sick leave until you report your recovery, by removing the checkmark.
At the start of leave, the rest of the day is registered up to your daily norm. And your calendar will be booked with leave (if the system is set up for it).

Start when you meet/end when you leave
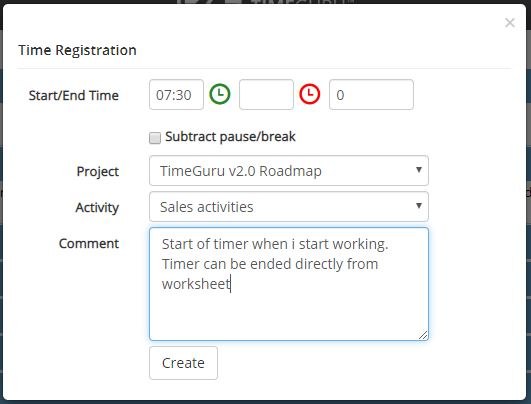
You can also start a timer when you arrive at work and stop it when you leave. Do this by clicking “+ Time” as before, but without filling in end time (like below screenshot). Now click the button “Create.” If you have more time registrations on a day, the system will automatically insert the end time as starttime on the next time registration.
When you leave or want to end the timer, click “End” (see screenshot below), to register your day.
Tips and Tricks
This is a few of the useful shortcuts and functions in the worksheet:
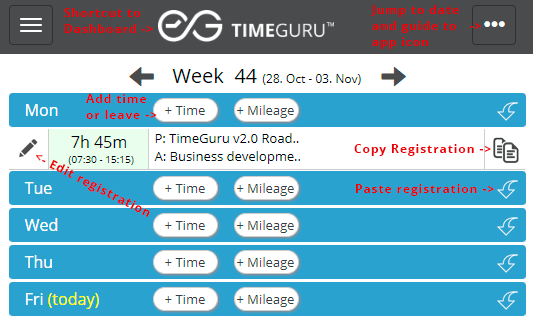
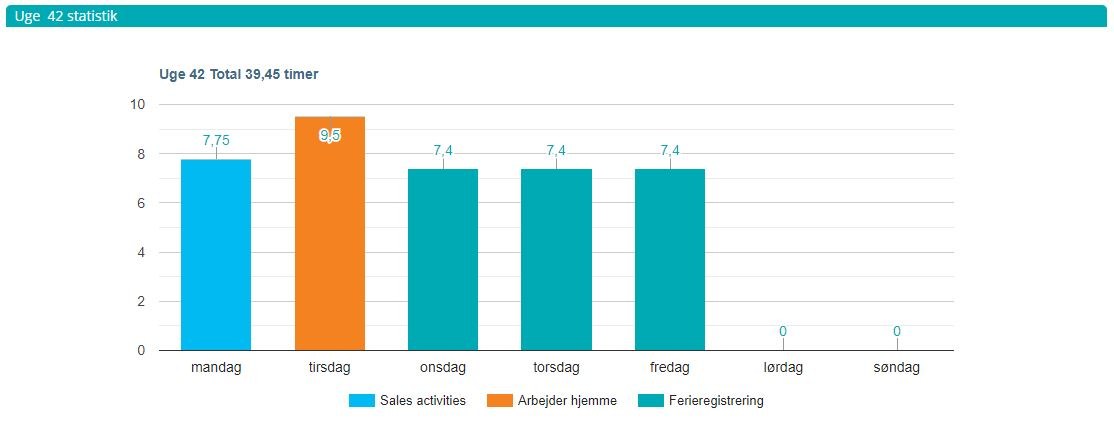
- Click the TimeGuru logo to go directly to your overview of flex time, leave statistics, workhour distribution and much more.
- Click the three dots “…” for more settings. Here you can quickly jump back to the old worksheets and see a guide to get the app icon on your phone.
- Register time by clicking “+Time”. This button is used for to time tracking, leave and vacation.
- Copy/Paste your registrations with the copy icon. You can paste the same registration multiple times.
- Edit your registrations by clicking the pencil to the left. Approved registrations cannot be edited.
Check out our “get started” userguide where we go through leave requests, statistics and reports.